
Installing an FRT Trigger requires precision, knowledge, and safety precautions. This detailed guide will walk you through the process step by step, ensuring a smooth and efficient installation for your AR-15 or other compatible firearms.
Introduction to FRT Trigger Installation
The Forced Reset Trigger (FRT) is designed to enhance the shooting experience by ensuring faster and more reliable trigger resets. It allows for increased firing speeds without compromising the safety mechanisms of your firearm. The installation process requires careful attention to detail, familiarity with firearm components, and strict adherence to safety guidelines. Understanding how to install an FRT trigger correctly is essential for safety and optimal performance.
Over the years, FRT triggers have grown in popularity among firearm enthusiasts due to their simplicity and potential to increase efficiency during shooting. While some might find the installation intimidating at first, this guide will walk you through it thoroughly to ensure success, whether you’re an experienced gunsmith or a dedicated firearm owner.
Tools and Materials Required for FRT Trigger Installation
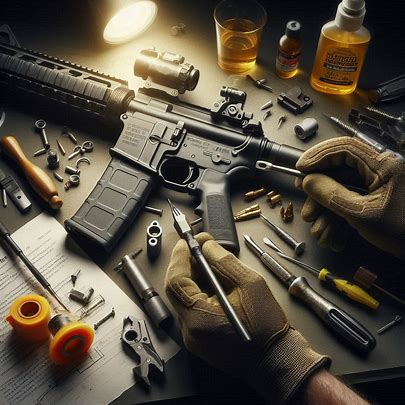
Before beginning, gather the necessary tools and materials:
- FRT Trigger Kit: Includes the specific trigger components needed for installation.
- Punch Set: For precise removal and installation of pins.
- Small Hammer: Useful for driving out or securing small pins.
- Screwdrivers: Precision screwdrivers for fine adjustments.
- Lubricant: Firearm lubricant reduces friction and ensures smooth operation.
- Safety Glasses: Protects your eyes during the process.
- Cleaning Cloth: Necessary for cleaning surfaces and components.
- User Manual for Reference: The manual provided with your FRT trigger kit.
- Gun Vise or Holder for Stability: Keeps the firearm steady during installation.
- Protective Gloves: Safeguards your hands from scratches and chemicals.
- Flashlight: Helps illuminate small, hard-to-see areas.
Having all the required tools within reach will save time and help reduce mistakes during installation. Using high-quality tools also ensures that the components are handled safely and securely.
Understanding the Components of an FRT Trigger
The FRT Trigger includes several crucial components that work together to ensure smooth operation. While each part plays a unique role, proper alignment and installation of all components are paramount:
- Trigger Group: The heart of your firearm’s firing mechanism.
- Hammer: Strikes the firing pin to initiate the discharge of the firearm.
- Pins: These hold the trigger group in place and ensure stability.
- Safety Lever: Maintains safe operation, preventing accidental discharge.
- Disconnector: Manages the engagement of the trigger mechanism for consistent operation.
- Tail: Aids in keeping trigger components properly aligned within the assembly.
- Bolt Carrier: Works in tandem with the FRT trigger to efficiently reset the trigger after firing.
Each component plays a vital role in the overall mechanism of the FRT trigger. Familiarize yourself with these parts before beginning the process to ensure proper installation.
Step 1: Ensuring Firearm Safety Before Installation
Before touching any tools or components, prioritize safety. Handling firearms always involves inherent risks, but careful preparation reduces the chances of accidents.
- Unload the Firearm: Remove the magazine and ensure the chamber is empty. This step is non-negotiable.
- Engage the Safety: Switch the safety lever to the “safe” position to prevent any accidental discharges.
- Wear Protective Gear: Safety glasses protect your eyes from debris, while gloves keep your hands safe.
- Clear the Work Area: A clutter-free workspace allows for better focus and reduces distractions.
- Double-Check the Chamber: Physically and visually confirm that the firearm is fully unloaded before proceeding.
The importance of these safety measures cannot be overstressed. Firearms are powerful tools, and mishandling them—even momentarily—can lead to serious injury or worse.
Step 2: Disassembling the Existing Trigger System
To install the FRT Trigger, you must first remove the existing trigger assembly. This part of the process requires precision and care to avoid damaging the existing parts or the firearm.
- Remove the Upper Receiver: Detach the upper receiver from the lower receiver to access the internal components easily.
- Detach the Bolt Carrier Group: Set it aside in a clean and secure spot.
- Carefully Remove Existing Pins: Use a punch tool and hammer to remove the trigger pins.
- Extract the Trigger Group: Lift out the current trigger group from the lower receiver.
- Inspect Components: Check for signs of damage or excessive wear on the internal components. This is also the ideal time to replace worn parts if necessary.
- Clean the Lower Receiver: Using a cleaning cloth, remove any dust, debris, or old lubricant from the area.
Disassembling the existing system provides a chance to inspect and clean the firearm thoroughly. This is essential for maintaining the reliability and safety of your firearm, especially when introducing new components.
Step 3: Preparing for the FRT Trigger Installation
Preparation is key to a successful installation. Organizing your tools and ensuring the components are in good condition will make the process smoother.
- Clean the Trigger Housing: Use a cleaning cloth and solvent to remove old debris and ensure a clean surface for the new components.
- Inspect Components: Look for any cracks, damage, or signs of wear in the trigger kit before installation.
- Lubricate Components: Lightly apply firearm lubricant to moving parts, particularly areas that experience high friction.
- Organize Tools: Set up your tools within easy reach and ensure proper lighting to illuminate your work area.
Proper preparation minimizes errors and keeps the installation process efficient and straightforward.
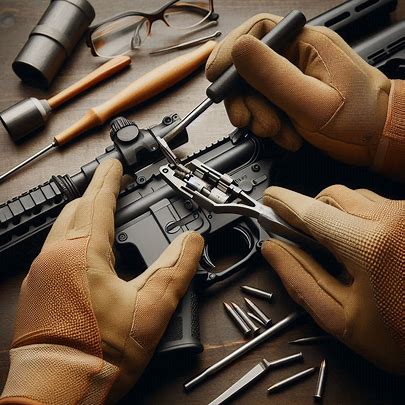
Step 4: Installing the FRT Trigger
Now comes the critical step of embedding the FRT Trigger into your firearm. Follow the steps below for a seamless installation:
- Place the FRT Trigger Group: Carefully position the trigger group into the lower receiver, ensuring all components fit snugly.
- Align the Holes: Check for proper alignment of the components and receiver holes.
- Insert New Pins: Use a punch tool and hammer to secure the new pins into place.
- Double-Check Alignment: Confirm that the trigger assembly is correctly seated and firmly positioned.
- Verify Other Components: Recheck the positions of the safety lever, disconnector, and tail component for proper alignment and operation.
At this stage, precision is crucial. Ill-aligned parts can cause malfunctions and compromise the safety of your firearm.
Step 5: Lubricating the Trigger Components
Lubrication ensures the smooth movement of parts. However, over-lubrication can attract dirt, so a balanced approach is essential.
- Apply a minimal amount of firearm lubricant to high-friction points, including the hammer and disconnector.
- Move the components to ensure the lubricant spreads evenly without excess buildup.
- Wipe away any excess lubricant using a cleaning cloth.
Proper lubrication not only prolongs the life of the parts but also prevents operational issues.
If you wanted to get more information, visit our website FRT Trigger.
Step 6: Testing the Trigger Mechanism
Testing is an essential step to ensure the safety and functionality of the newly installed trigger system.
- Reassemble the Upper Receiver: Attach it back to the lower receiver.
- Perform a Dry Fire Test: Without live ammunition, pull the trigger to confirm smooth operation.
- Check Trigger Reset: Ensure the trigger resets correctly after each pull.
- Test the Safety Lever: Engage and disengage the safety to confirm it functions properly.
- Repeat Tests: Perform several dry fire tests to confirm the consistency and reliability of the trigger.
Testing is critical to catch potential issues before live firing. Never skip this step.
Common Issues During Installation and Troubleshooting Tips
Even with detailed instructions, challenges may arise. Below are some common problems and how to address them:
- Trigger Not Resetting: This may result from misaligned pins or insufficient lubrication. Realign the pins and reapply lubricant as needed.
- Stiff Trigger Pull: Check for debris or misaligned components. Clean the area thoroughly and ensure all parts are properly seated.
- Malfunctioning Safety Lever: This issue often arises from improper positioning of the trigger group. Confirm the trigger assembly is installed correctly.
- Misaligned Pins: If pins don’t align properly, remove and reinsert them using a punch tool.
Patience and attention to detail go a long way in resolving these issues.
Maintenance Tips for Longevity of FRT Trigger
To ensure your FRT trigger continues to perform optimally:
- Clean the trigger assembly after every shooting session.
- Regularly inspect for signs of wear, especially on high-stress parts like the hammer and disconnector.
- Apply lubricant periodically, depending on usage.
- Store your firearm in a dry, secure location to prevent rust.
- Invest in professional inspections to ensure optimal functionality, especially after extended use.
Legal Considerations in the USA for FRT Trigger Installation
The legality of owning and installing FRT triggers varies by jurisdiction:
- Check Local and Federal Laws: Regulations differ between states. Confirm the rules specific to your location before proceeding.
- Consult Professionals: Speak with a licensed gunsmith or legal expert for guidance.
- Stay Updated: Firearm legislation changes often. Keeping informed is key to staying compliant.
Using an FRT trigger responsibly also involves understanding the full legal context to avoid unintended violations.
Importance of Professional Assistance
While this guide provides comprehensive details, professional assistance can offer additional assurance:
- Gunsmith Expertise: Certified gunsmiths possess the training and tools needed for precise installations.
- Error Prevention: Professionals can help avoid costly mistakes.
- Legal Compliance: Ensures all components and processes follow local regulations.
When in doubt, don’t hesitate to seek expert help.
Storage and Handling of FRT Trigger
Proper storage protects your firearm and its components:
- Store the firearm in a secure location, like a gun safe.
- Use desiccant packs to control moisture and prevent rusting.
- Regularly inspect your firearm for dust or debris buildup.
- Avoid prolonged exposure to adverse environmental conditions.
Additional Accessories to Enhance Firearm Performance
To further enhance your firearm, consider these upgrades:
- Upgraded charging handles for smoother operation.
- High-quality bolt carrier groups for improved durability.
- Custom grips and handguards for better handling.
- Adjustable stocks for comfort and accuracy.
Conclusion
Installing an FRT Trigger is a rewarding process that enhances firearm efficiency and shooting experience. By following the detailed steps outlined in this guide, ensuring safety, and utilizing the correct tools and techniques, you can achieve a successful installation. Remember, regular maintenance and proper handling extend the life and performance of your trigger. Should you encounter any challenges, seeking assistance from a professional gunsmith is always advisable. Responsible firearm ownership begins with knowledge and safety, so approach your FRT trigger installation with diligence and care. Enjoy the improved performance of your firearm with a correctly installed FRT Trigger.
